Daisy Integration
In order to setup integration with Daisy follow the below steps:
1) Create a Service for Daisy
To create the service please go to Billing> Services:
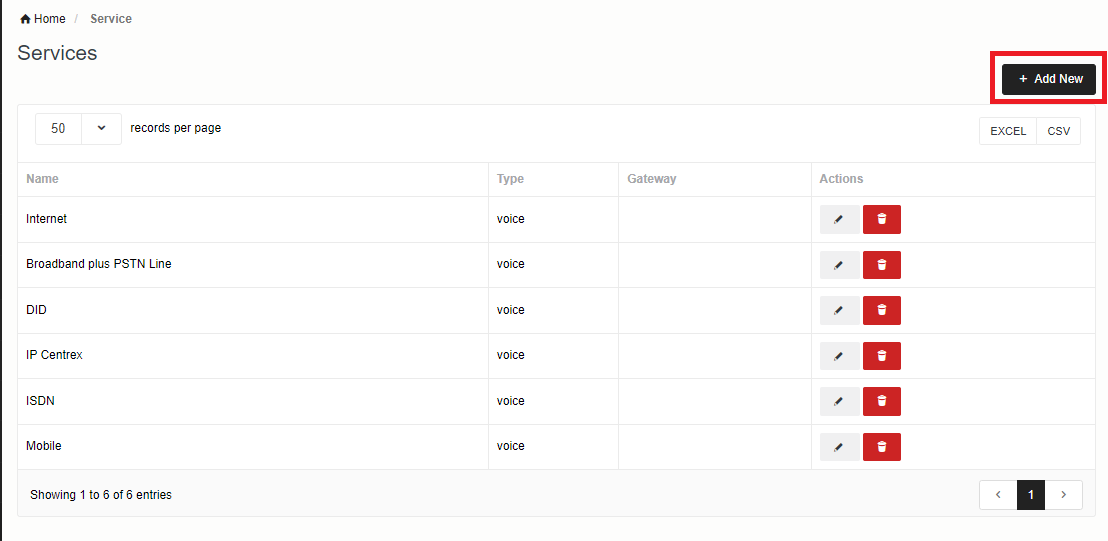
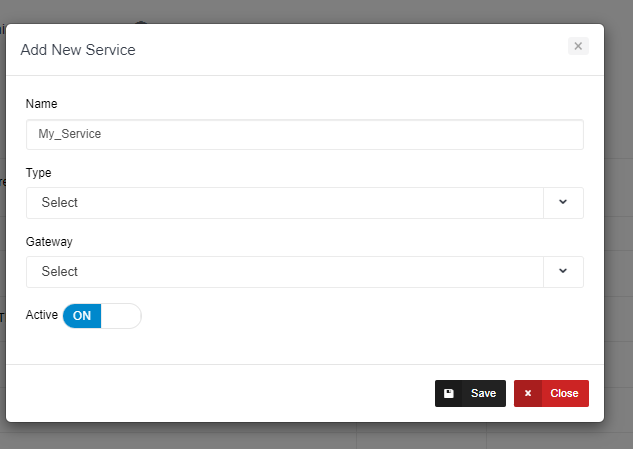
Here please give a name to your service and click on the save button. Your service will be added.
2) Daisy Integration:
To integrate with Daisy go to Integration>Billing Gateways > click on Daisy. The following window will be opened and now click on the Add New button
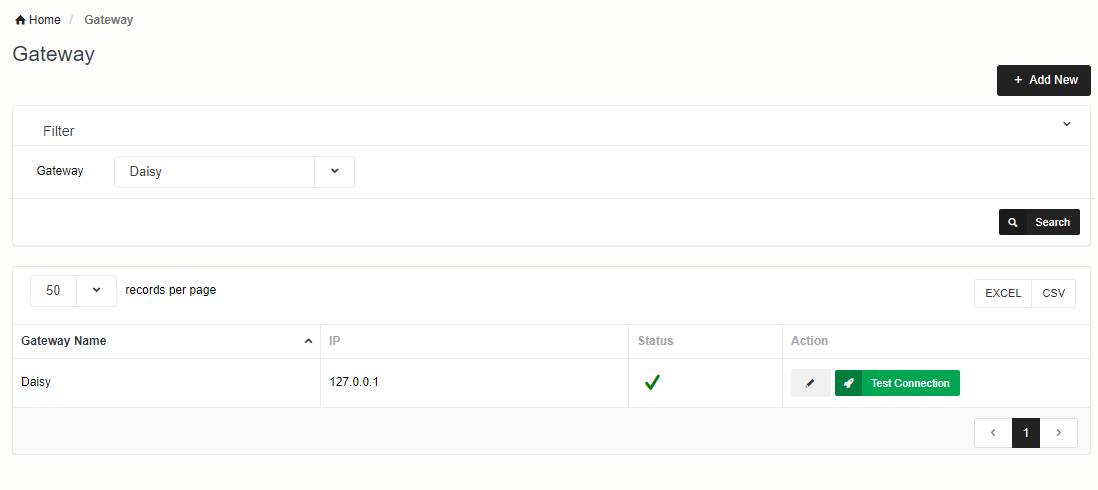
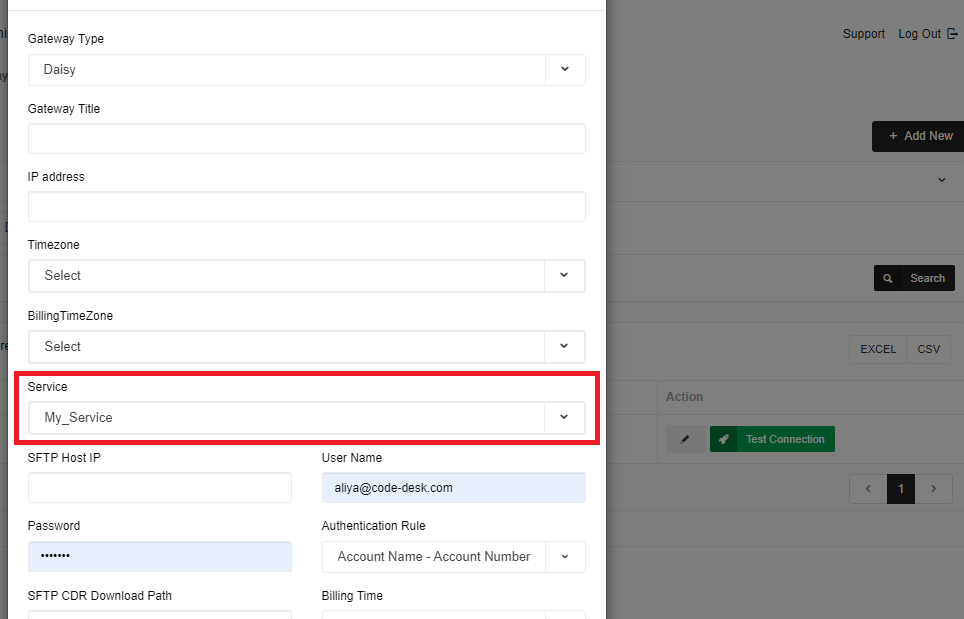
Here we need SFTP details like HostName, UserName, Password, and File Path. Select the service which you want to add. Please enter all details and click on save button.
If the rerate option is ON (you are rating in NEON) then you need to create the Rate Table.
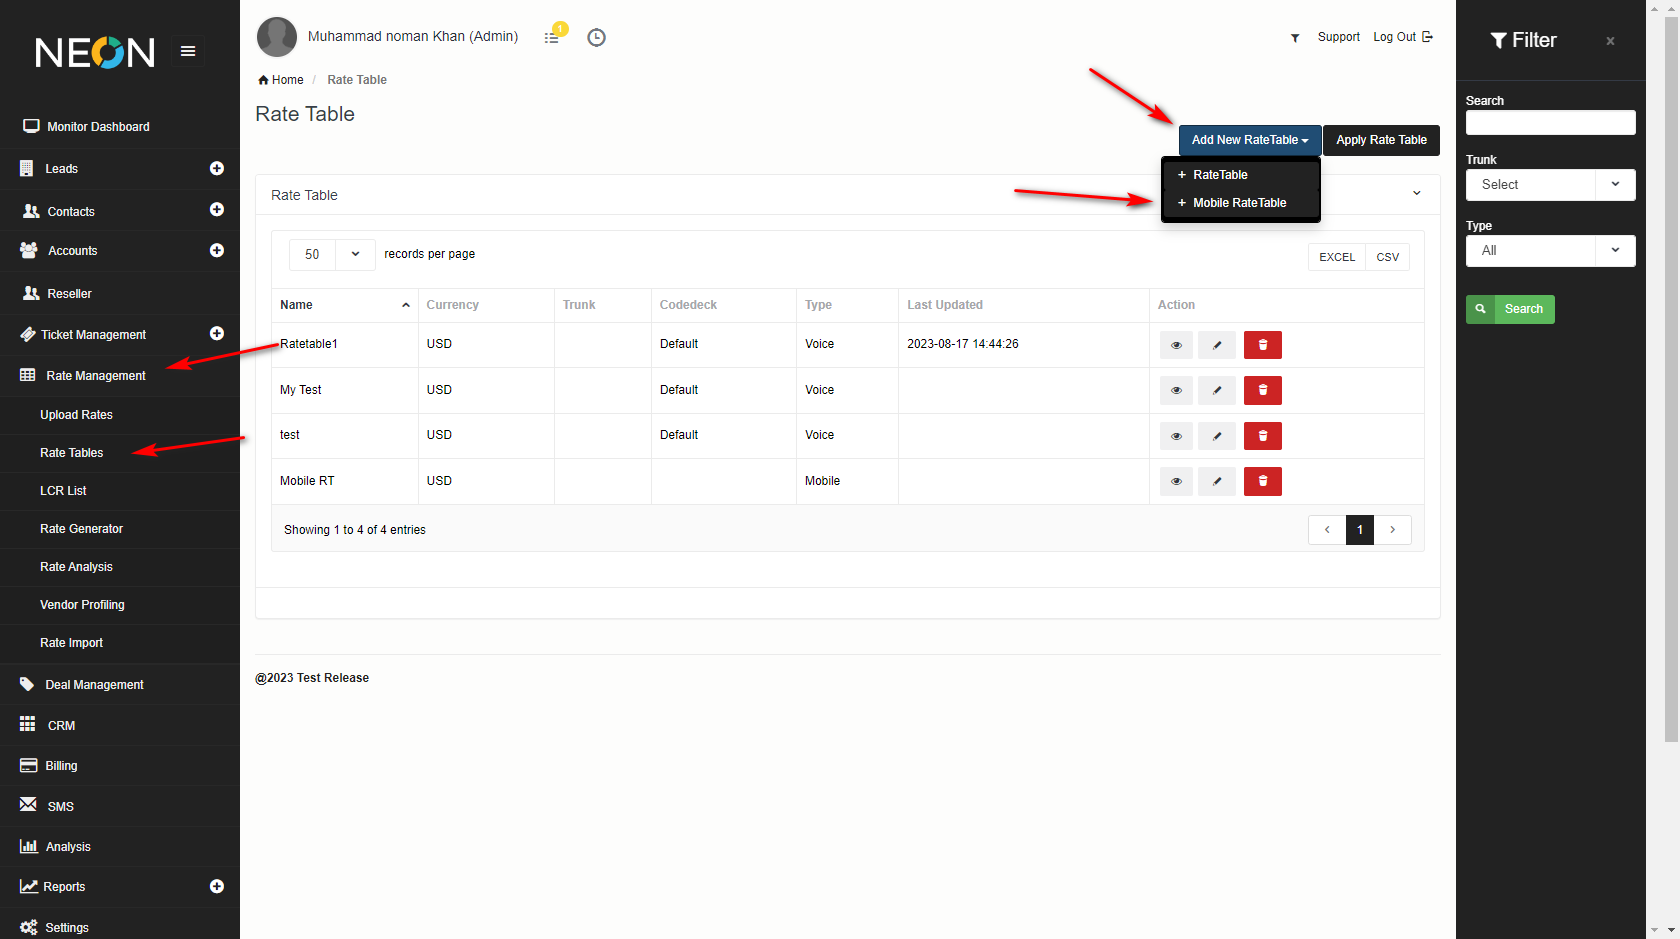
3) Mobile Rate Table Setup
Step 1: Create
Here you can create a mobile rate table according to the screenshot steps. Click on Add New Rate Table > then click the Mobil Rate Table option.
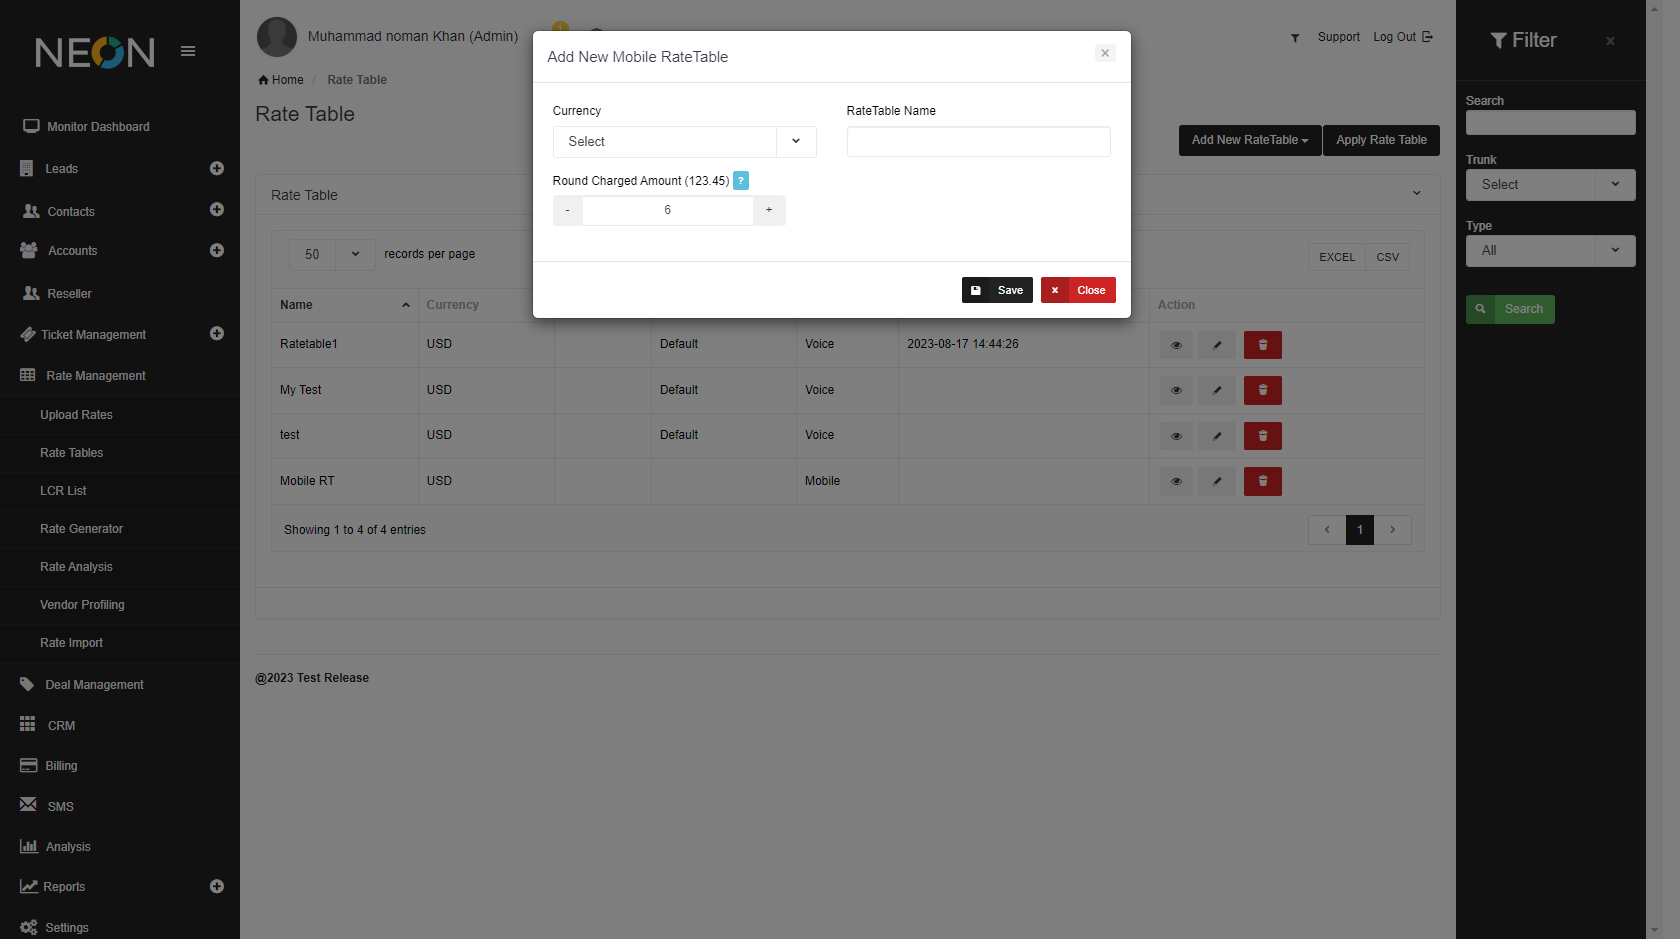
Now fill in the required fields and save it.
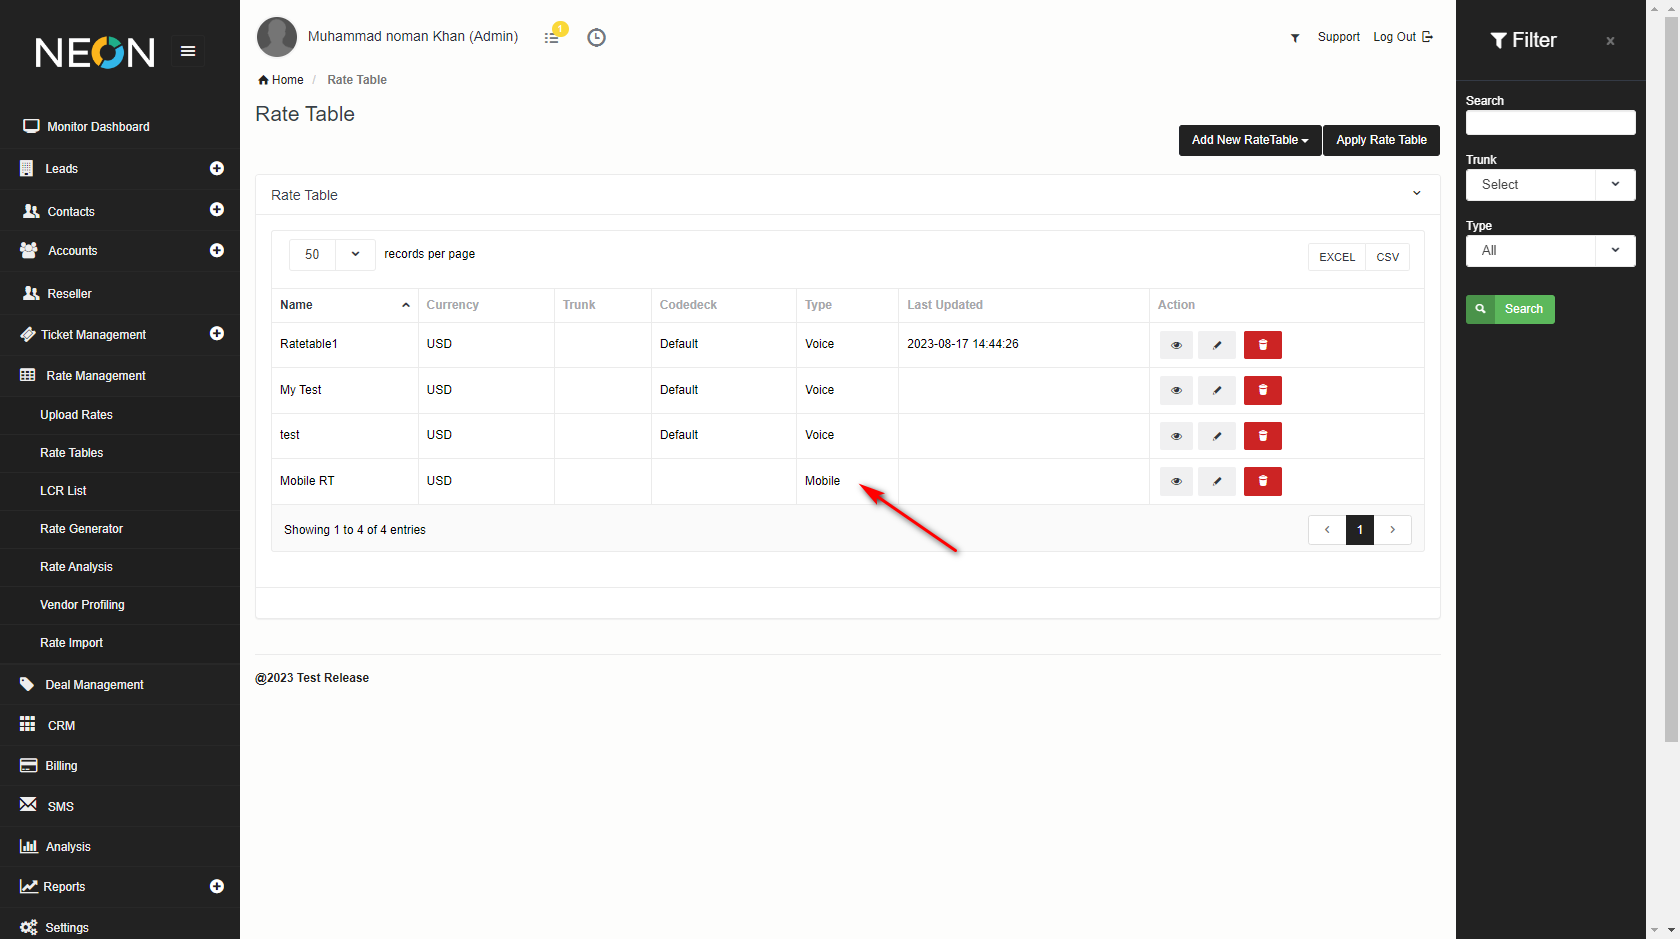
Here you can see both the Mobile Rate Table and Voice Rate Table with the help of the Type column and you can filter it also.
Step 2: Rate Upload
In order to upload rates click on Upload Rates.
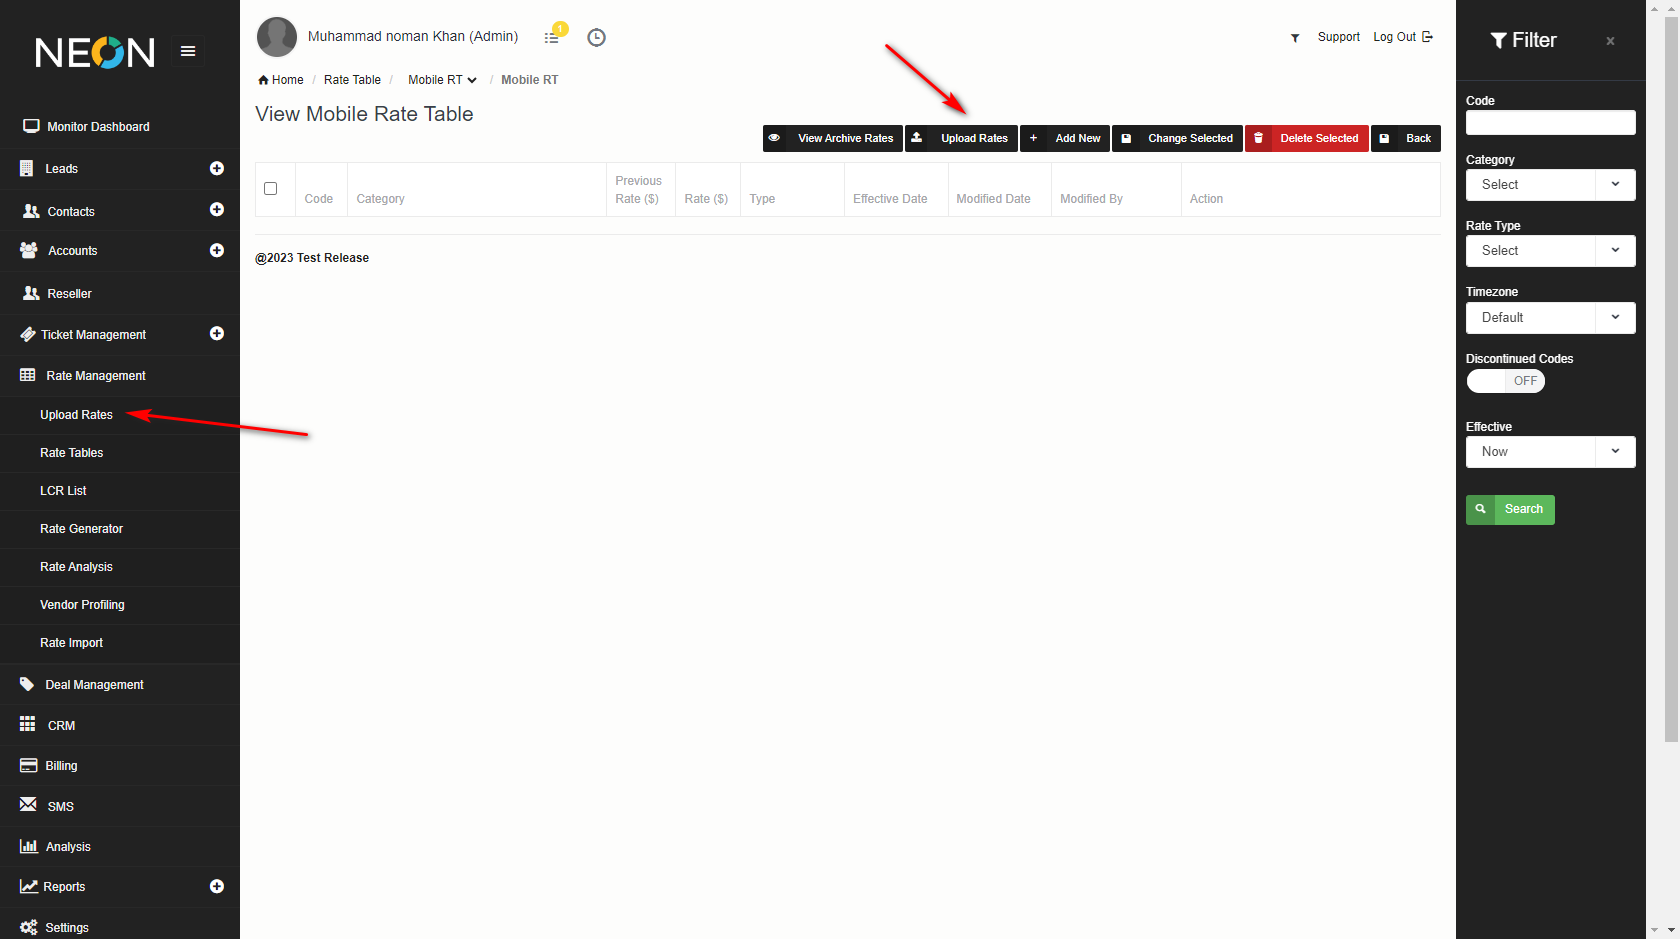
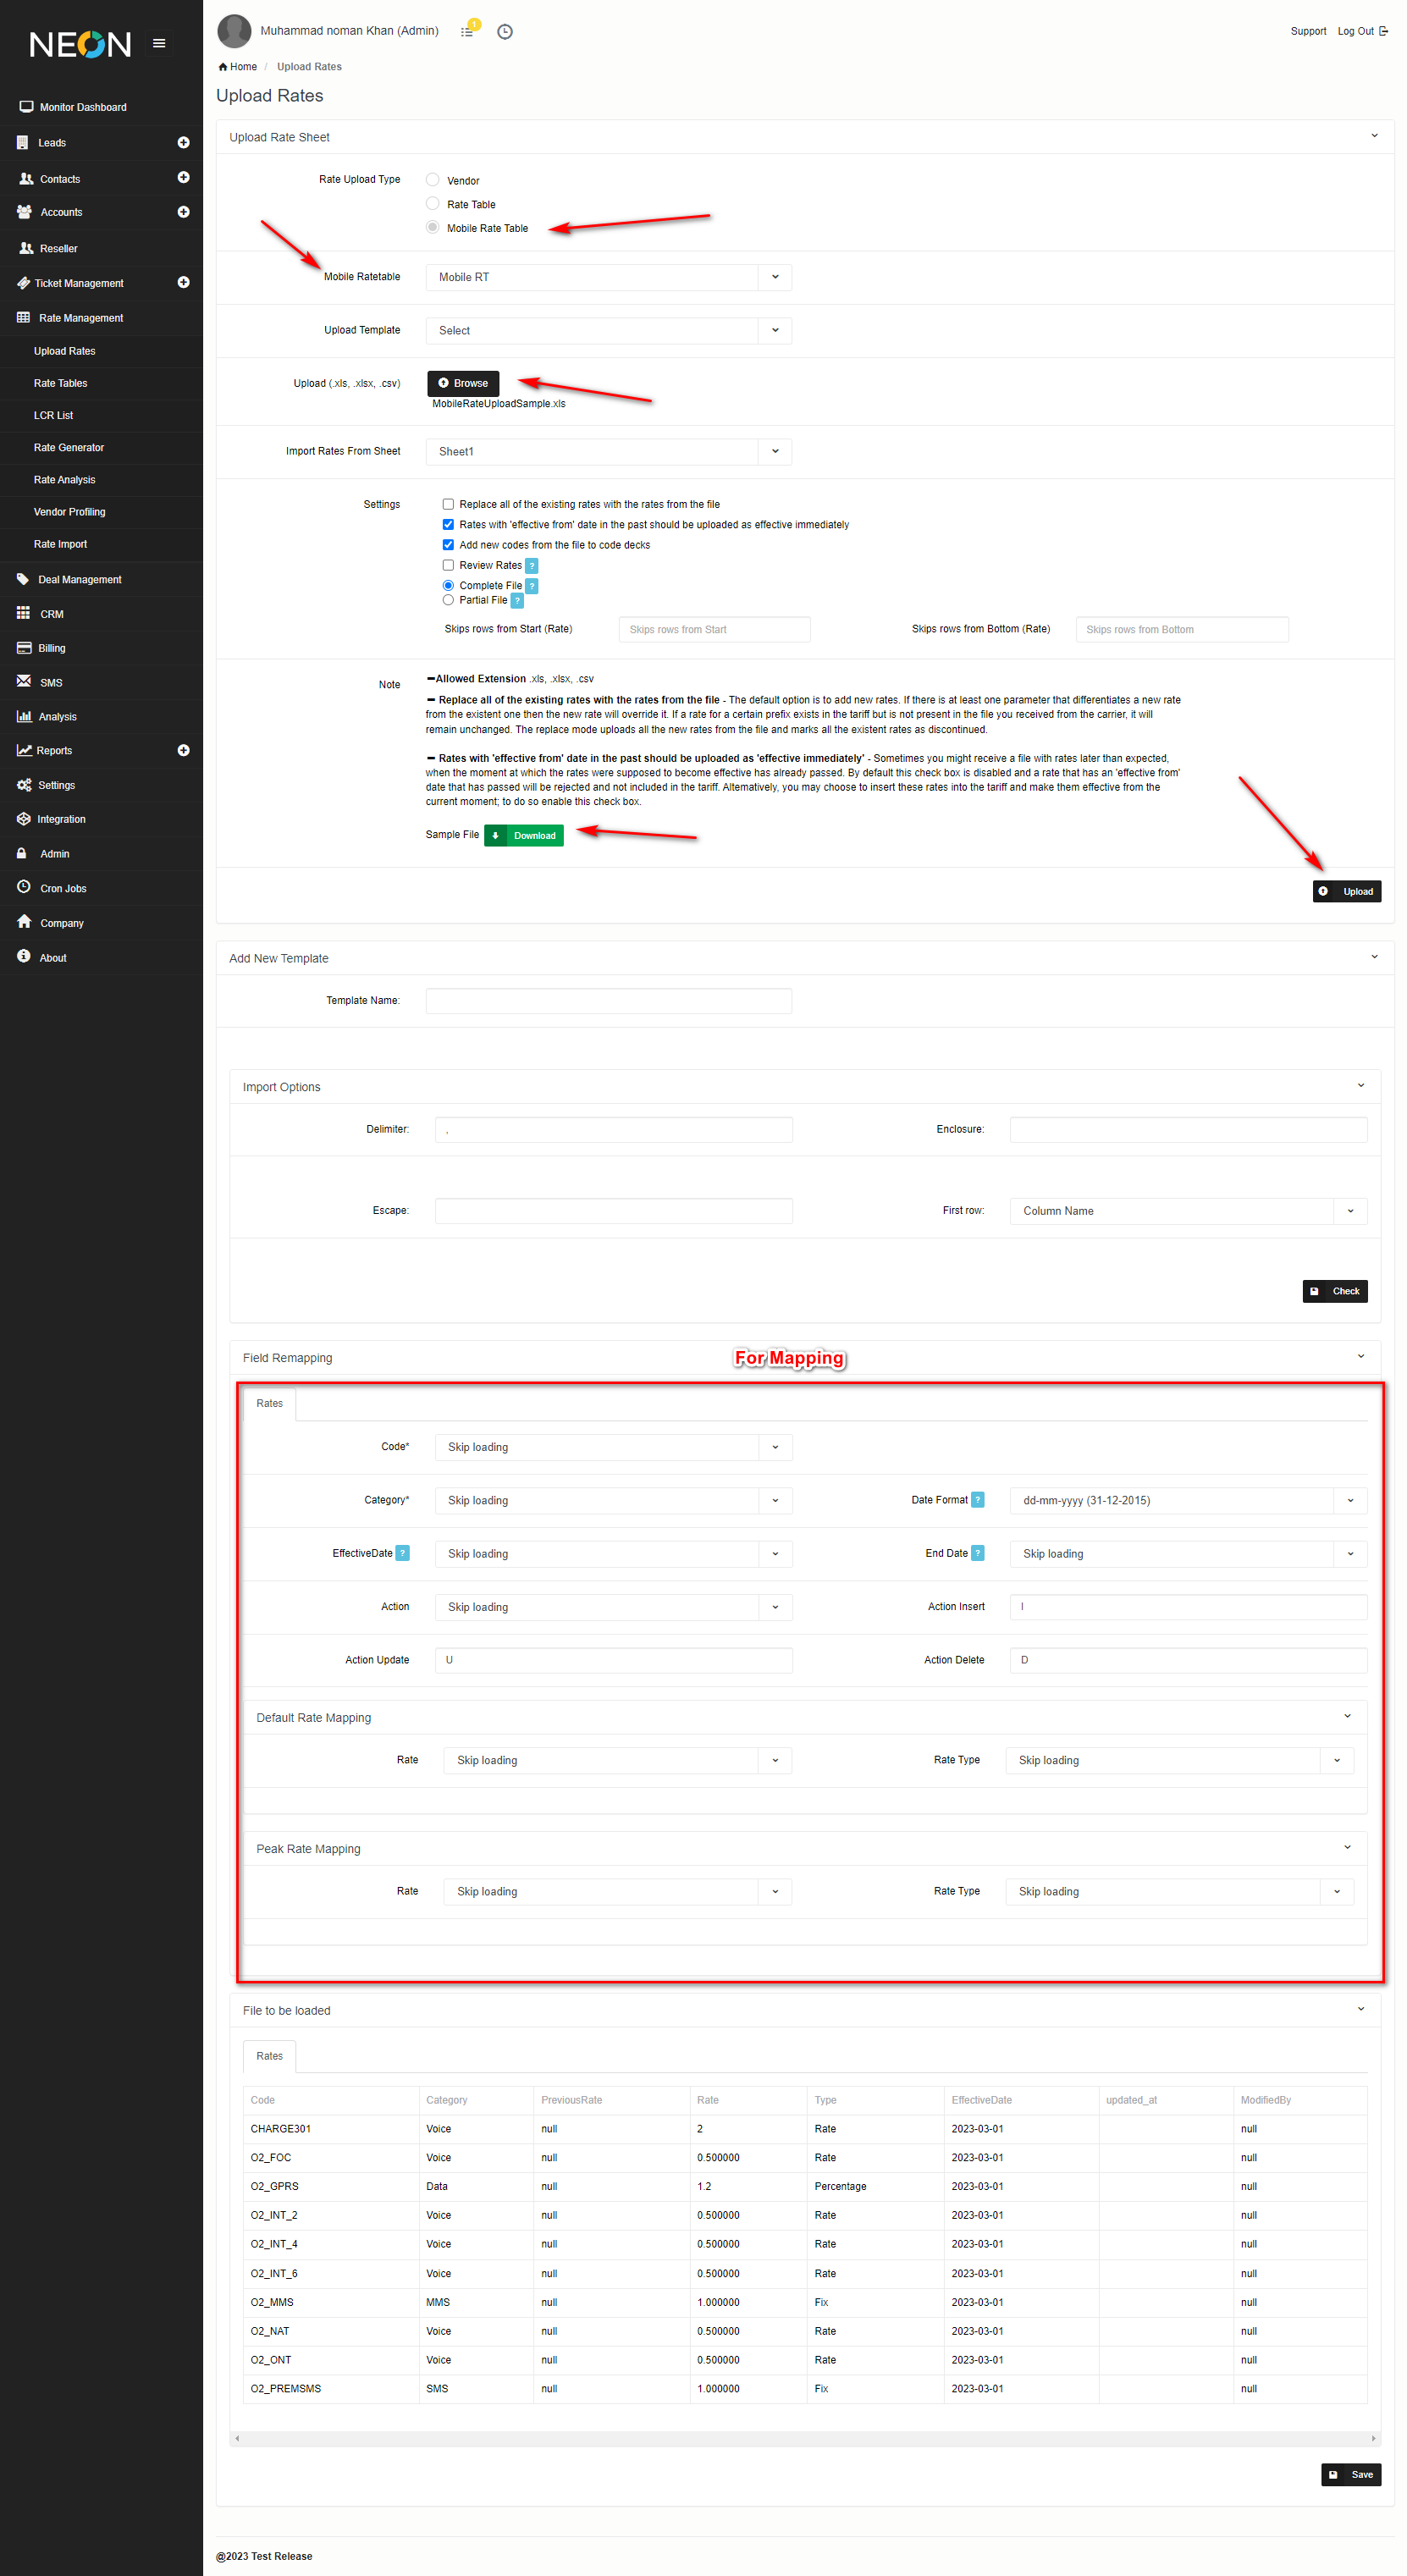
In upload rates screen, select the mobile rate table then select your particular rate table from drop down menu. You can also select your template from the upload template option. You can also download the sample file from the Note section > Sample File button, to check the column format of rates ( csv, xls, xlxs). After this click on the upload button.
Scroll down for the Mapping Section, map the required fields, and then click on the save button.
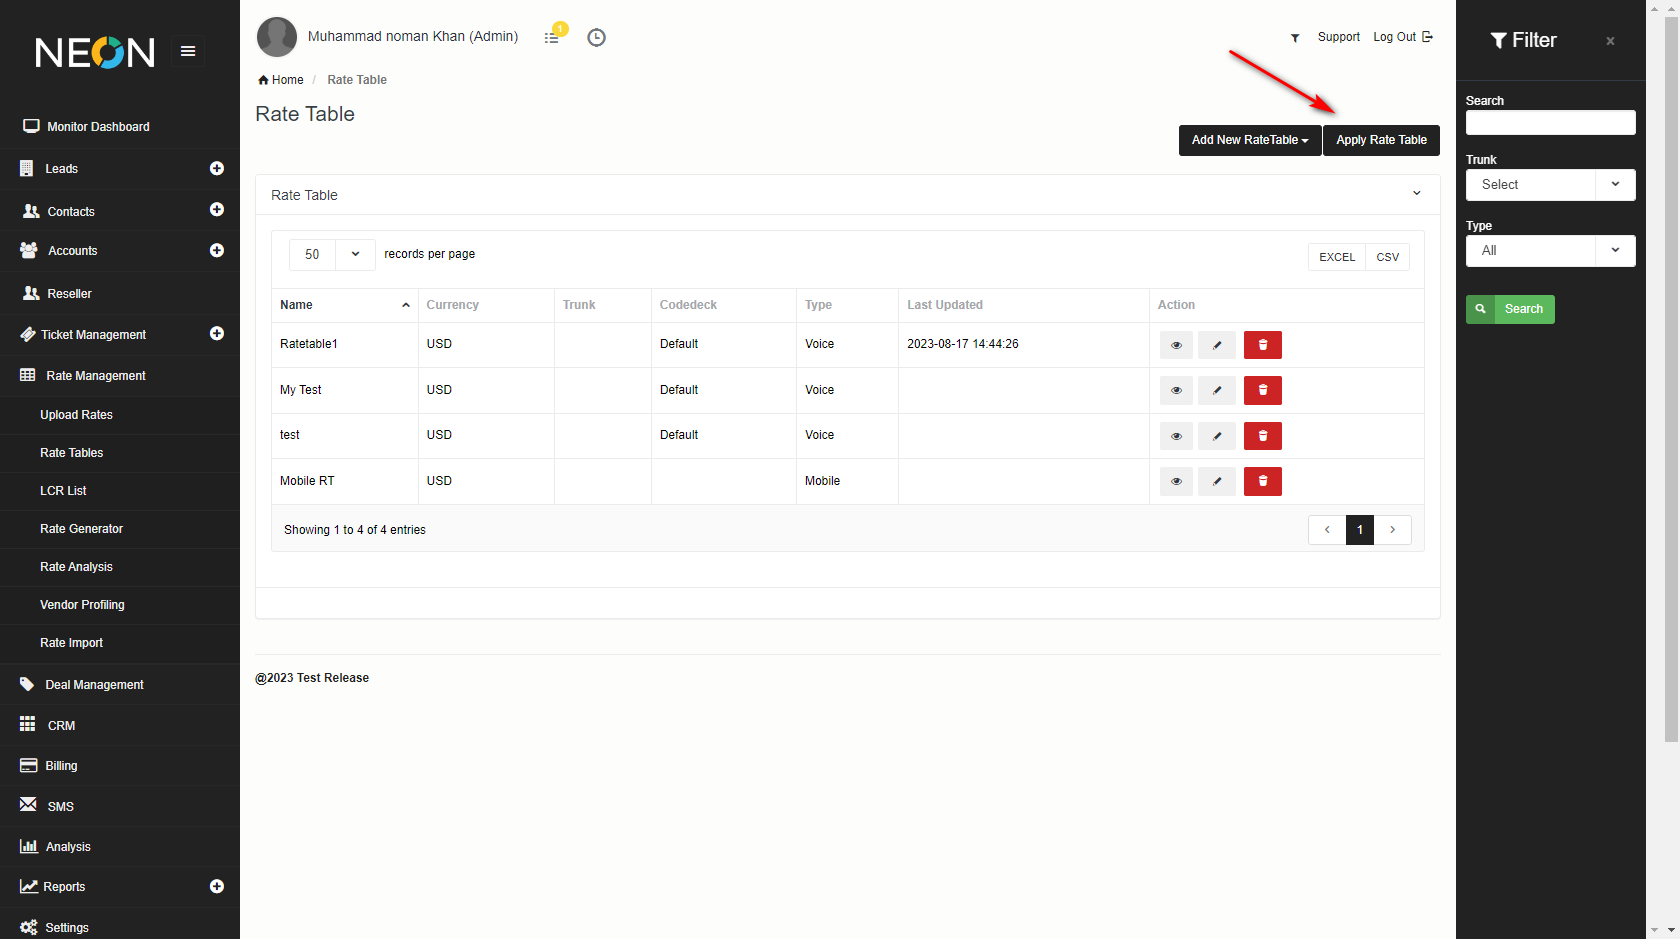
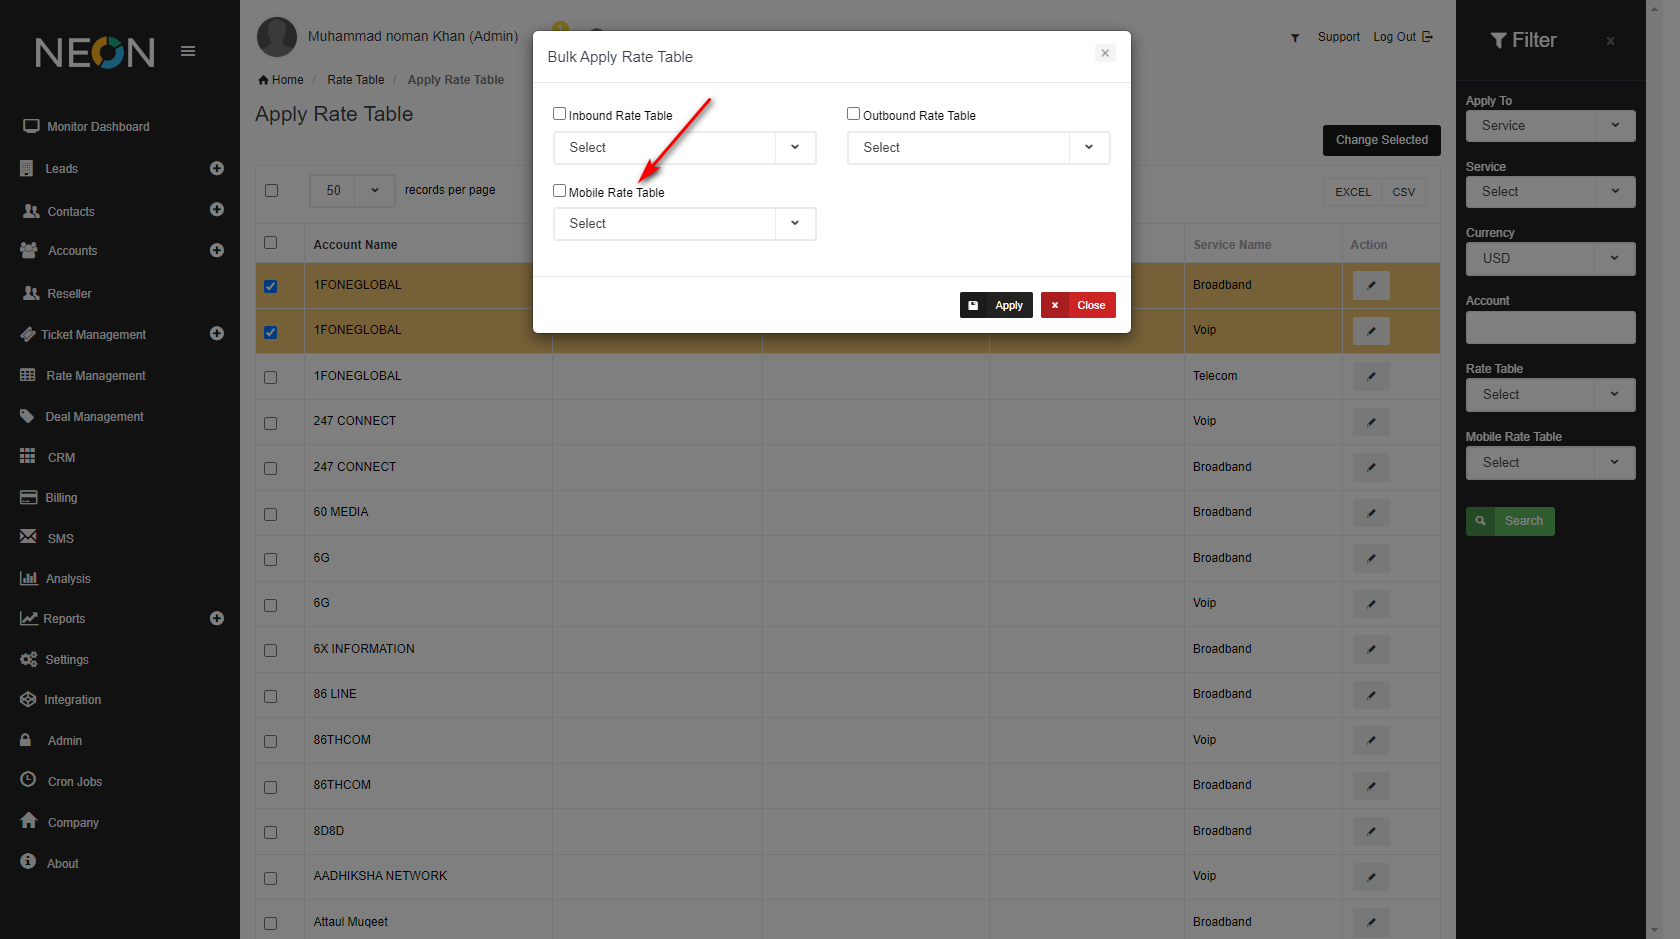
Step 3: Apply Rate Table
Here you can apply the rate table to the customer, by clicking on the Apply Rate Table button.
From the Filter side bar, select Service from Apply To drop-down menu, then click on Search.
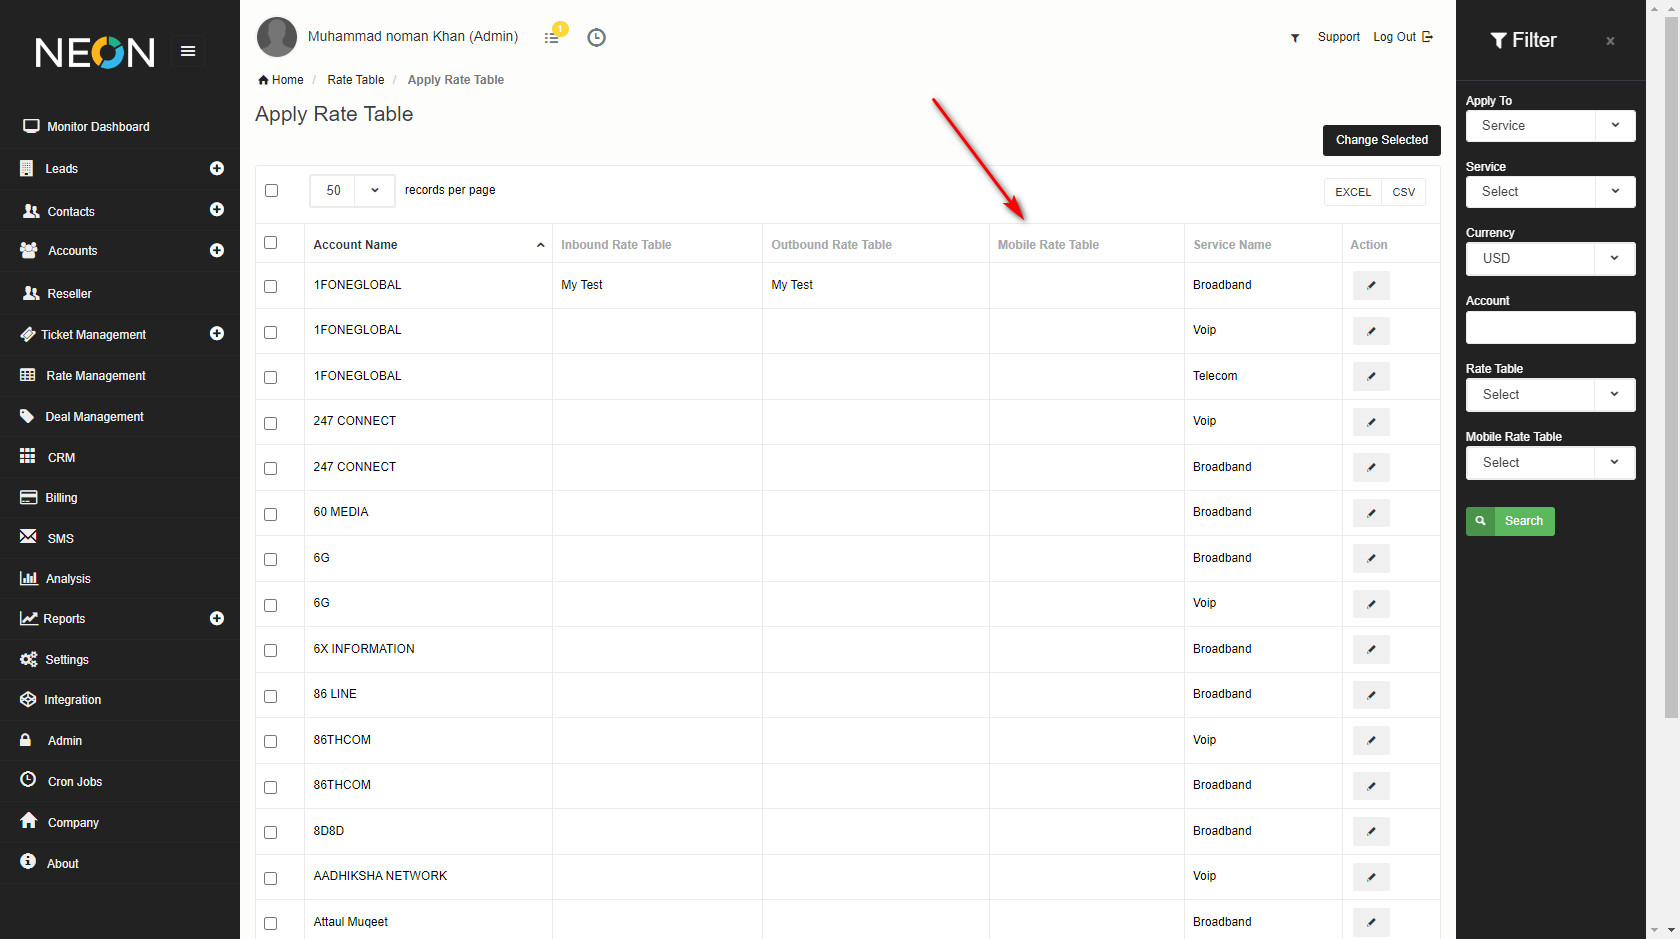
You can select Multiple Rows then click on the Change Selected button, select the Mobile Rate Table, and click on the Apply button.
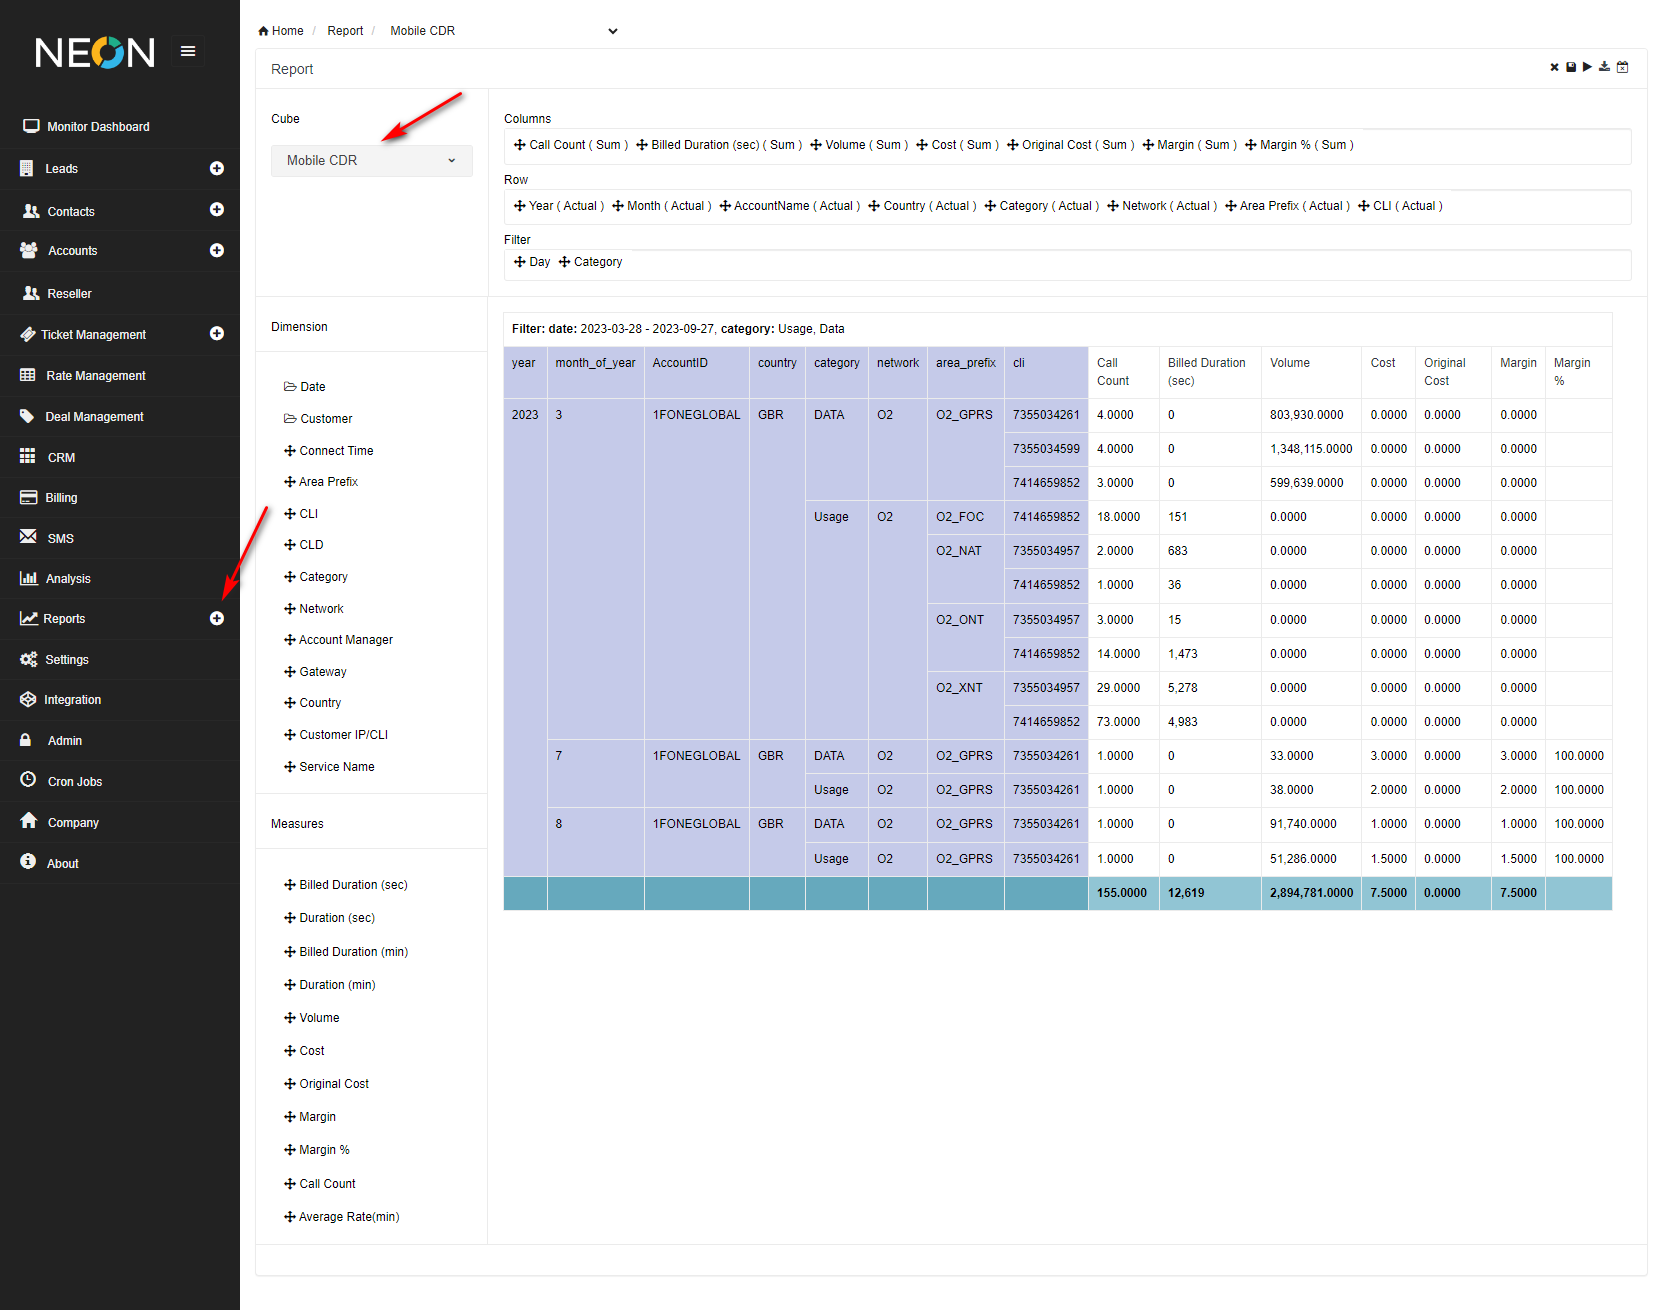
4) Mobile CDR Report
From the side bar click on the Reports Plus button and select Moblie CRD from the Cube section. Now you can drag and drop your dimensions and measure in columns, rows, and filter fields. Now you can save and run your report.
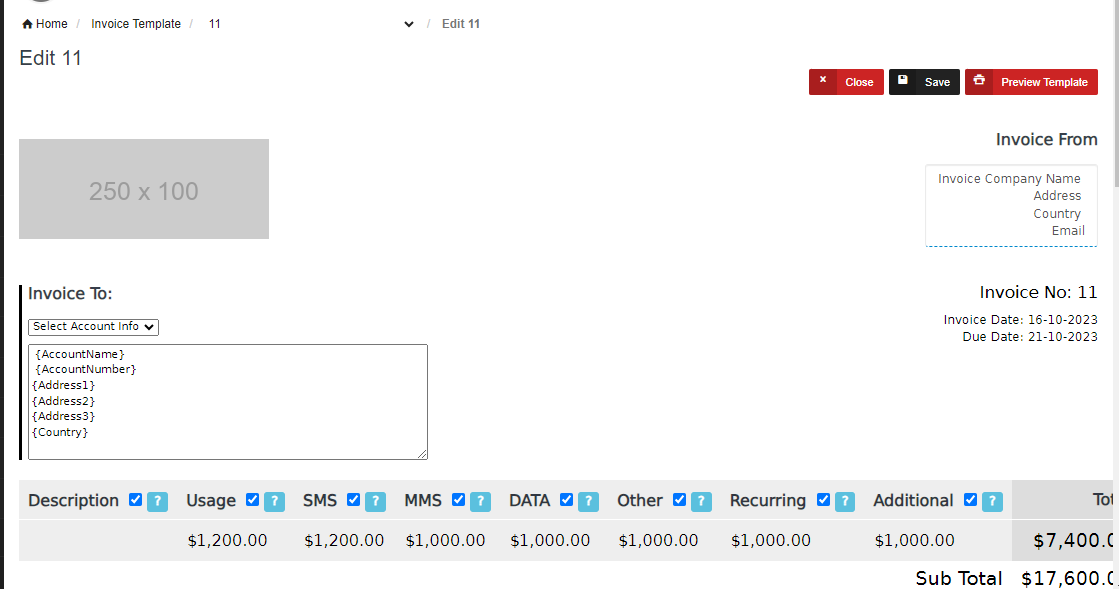
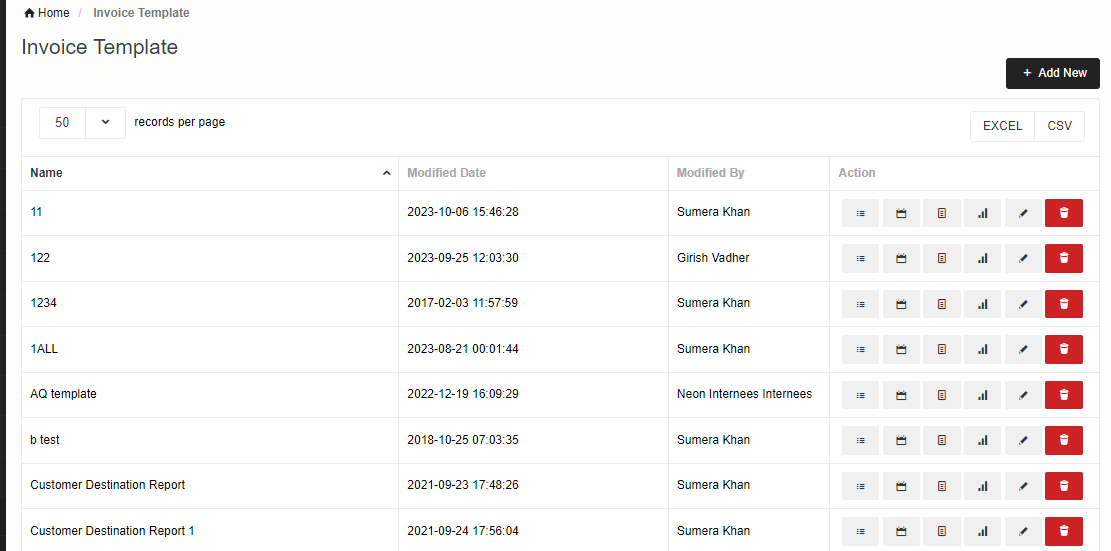
5) Set Invoice Template and Periodic View
You can set invoice templates according to your needs. To set your template please go to Billing> Invoice Template. Click on the Add New button.

Please enter the required fields and click on the save button.
Now click on the Periodic View button.
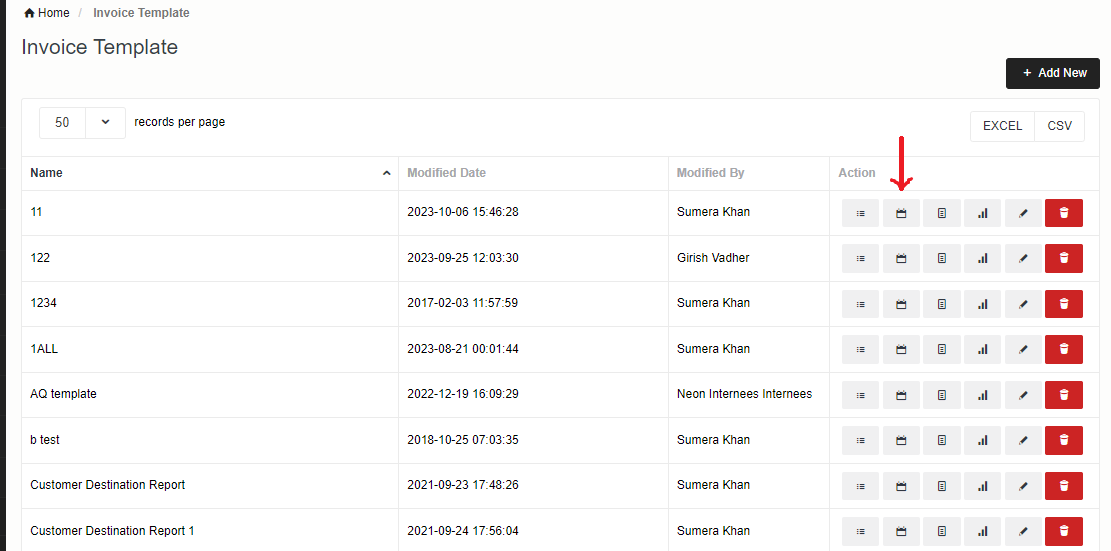
Once you click on the Periodic View button, the following screen will open. Her you can set your invoice template for mobile CDRs.